Well, the next step in continuing the cuddy cabin was to get the anchor well prepped and painted so that I could install the bulkhead between the anchor well and the cuddy cabin.
Tolman skiffs and Great Alaskan boats do not have an anchor well. They have a kind of "tub" in the front for holding the rope and anchor, usually in a milk crate. This is a great, simple solution, but I wanted something different.
I wanted a windlass on my boat, so I needed a large, deep well to hold the chain and rode. My solution was to simply make the front deck area flat, and put a bulkhead up to create the chamber.
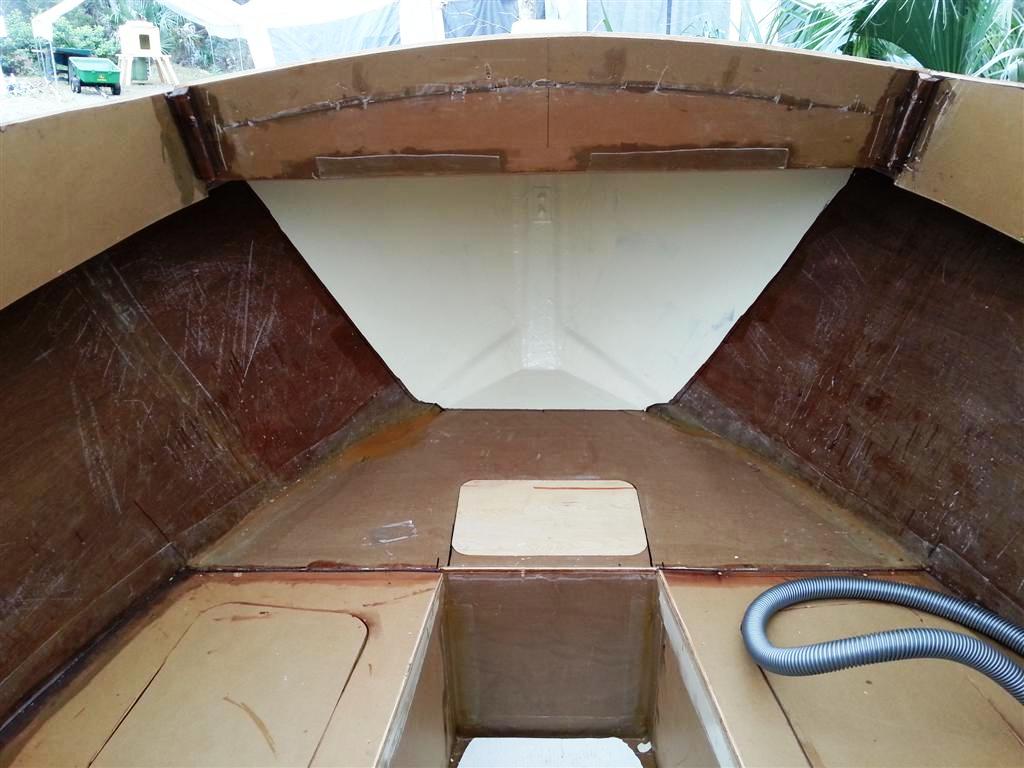


Next I installed the three roof supports for the cuddy. I decided to install the anchor well bulkhead before putting on the roof.

The three roof supports are in and now it is time to put on the roof. I needed to scarf two pieces of plywood together for the roof. I decided to try a different method, and it worked great.
First I cut the scarf using my circular saw jig. I was using 1/2" plywood for the roof, so the saw did not cut all the way through, so I just finished cutting through with a pull saw. It went fast and worked great.
Next, I layed out 6 sawhorses so the two panels were supported. I put plastic under the spots on the horses where the epoxy would squeeze out.
I painted the joints with plain epoxy until they would not soak anymore in, then buttered them up with thickened epoxy glue.
What I did different was I screwed the first panel down to the sawhorses so it would not move, then placed the other panel in position . Then I screwed that panel down onto the horses. Finally, I used some fine threaded sheetrock screws to draw the scarf together and get the joint right. Then I used a scraper to spread the squeeze out back into the joint and scrape it flush.
When it dried, it was the smoothest and straightest scarf joint I had made yet.
Here are a couple of pictures. The first is the panels lined up on the horses. The second is a closeup of how smooth the joint turned out.


Now the roof is ready for glassing.
Next up is to glass the roof, clean up the inside of the cuddy and then paint it and it will be done! On to the pilot house after that!
No comments:
Post a Comment